📋 Seasonal Pontoon Maintenance Checklist: Spring Launch to Winter Storage
Most pontoon damage does not happen while you are on the water. It happens between seasons — from what owners did not do before putting the boat away or before launching it again. Corroded terminals, cracked fuel lines, water trapped inside logs, and seized wheel bearings are all preventable problems that turn into four-figure repair bills because someone skipped a 10-minute task.
The 80/20 rule applies here: 80% of expensive pontoon repairs are preventable with 20% effort at the right time. This checklist covers the exact tasks — organized by season — that keep your boat running reliably and hold its resale value. Every item is sourced from real owner experiences documented on PontoonForum, iBoats, and Reddit.
🌸 Spring Commissioning Checklist
Complete these before the first launch of the season. Budget 2–4 hours for a thorough spring commission — it saves 10x that in mid-season breakdowns.
Pontoon Logs and Hull
- Inspect drain plugs — replace rubber gaskets annually ($2 per plug). A cracked gasket is the #1 cause of water inside pontoon logs, which leads to the single most expensive repair on a pontoon boat.
- Walk the logs visually — look for new dents, corrosion spots, and water marks at the stern. Discoloration or staining near the waterline at the back of the log suggests water has been sitting inside. If the boat is sitting low in the back, check for water weight in the stern logs before launching.
- Check sacrificial anodes — replace zinc or magnesium anodes when they are 50% consumed. Missing anodes accelerate corrosion at every weld joint. Shop anodes →
Electrical System
- Inspect all wiring connections — look for corroded terminals, frayed wires, and electrical tape splices (a sign of previous hack repairs). If you find a nest of taped connections, see the full guide on fixing a pontoon wiring rat's nest.
- Battery: charge, load test, clean — scrub terminals with a baking soda paste (1 tablespoon baking soda to 1 cup water), rinse, dry, and apply anti-corrosion spray or a thin coat of dielectric grease. A battery that sat uncharged all winter is likely sulfated — load test it before trusting it on the water.
- Test navigation lights, horn, and bilge pump — all three are required by law and all three are commonly dead after winter storage.
Fuel System
- Check fuel lines for cracks — squeeze each rubber line and look for surface cracking or stiffness. Ethanol-blended fuel degrades rubber over time. Replace any line that feels stiff or shows surface checks.
- Replace the fuel filter — a $6 inline filter replacement takes 10 minutes and prevents $300+ injector or carburetor cleaning jobs.
- Add fuel stabilizer if fuel sat over winter without treatment — if you forgot stabilizer in the fall, add it now and run the engine for 10 minutes to circulate it through the system. Watch for fuel burping when you fill up — it indicates a blocked vent line.
Engine
- Check oil level — top off or change if it was not changed before winter storage.
- Check lower unit gear oil — pull the lower drain plug and look at the oil that comes out. Milky or chocolate-colored oil means water intrusion — the lower unit seals need replacing before you run the engine.
- Water pump impeller — replace every 2 years or 200 hours, whichever comes first. A failed impeller causes engine overheating within minutes, and if you crack a cylinder head from overheating, the repair bill starts at $2,000.
- Inspect the prop — look for dings, bent blades, and fishing line wrapped around the shaft. Even minor prop damage causes vibration that wears out hub bearings over a full season.
Seats and Upholstery
- Clean vinyl with marine vinyl cleaner — not household cleaners, not bleach, not Magic Eraser. These strip the UV coating and cause cracking within a season. See the Simtex seat stain removal guide for safe cleaning methods that work on all marine vinyl.
- Apply 303 Aerospace Protectant — this is the industry standard UV protectant for marine vinyl. Apply to all seats, cushions, and exposed vinyl surfaces. Reapply every 4–6 weeks during boating season.
- Check seat mount hardware — verify all seat pedestals, hinges, and latches are tight. Loose seat mounts get worse over a season of wave impact.
Safety Gear
- PFDs — check condition of all life jackets. Ripped fabric, broken buckles, or waterlogged foam means replace. You need one USCG-approved PFD per person plus one throwable (Type IV).
- Fire extinguisher — check the charge gauge and the manufacture date. Marine fire extinguishers expire after 12 years regardless of charge level.
- Flares — check expiration dates. Expired flares do not count toward USCG requirements, even if they still work.
Trailer
- Grease wheel bearings — use a bearing buddy or marine-grade wheel bearing grease. Bearings that sat all winter without grease are the #1 cause of roadside trailer failures.
- Check tire pressure and tread — trailer tires deteriorate from UV and age even when they look fine. Replace any tire older than 5 years regardless of tread depth (check the DOT date code on the sidewall).
- Inspect trailer lights and wiring — test all lights with the tow vehicle connected. Corroded trailer connectors cause more no-light situations than bulb failures.
- Check winch strap — look for fraying, UV damage, and a working ratchet mechanism. A failed winch strap on the ramp means the boat slides off the trailer into the water uncontrolled.
☀️ Mid-Season Checks
Every 4–6 weeks during boating season. These take 20 minutes and prevent the slow-developing problems that ruin a season.
- Wipe down seats after every outing — a quick wipe with a damp microfiber towel after each trip prevents 80% of staining. Sunscreen, body oil, and bird droppings set into vinyl within 24–48 hours if left untreated.
- Reapply 303 Protectant every 4–6 weeks — UV protection breaks down over time. Skipping reapplication mid-season is why seats crack by year 3.
- Check bilge pump operation — pour a bucket of water into the bilge and confirm the automatic float switch activates the pump. A failed bilge pump does nothing until the one time you need it.
- Inspect dock lines and fenders — check for chafing where lines contact the dock or boat. A pontoon that wind sails at the dock puts enormous stress on lines — replace any line showing core fibers.
- Check engine oil level — top off as needed. If the oil is black and gritty mid-season, change it early rather than waiting for fall.
- Clean pontoon logs if oxidation is visible — white chalky residue on aluminum logs is surface oxidation. Clean with an aluminum-specific cleaner (not general-purpose boat wash) and apply a pontoon log sealant to slow future oxidation.
- Tighten loose hardware — bimini top fittings, seat mounts, railing connections, and cup holder mounts all vibrate loose over a season of wave impact. A 10-minute walk-around with a socket set prevents rattles and the eventual lost-overboard bolt.
🍂 End-of-Season / Winterization Checklist
The winterization checklist is the most skipped and the most expensive to skip. Every item below has a direct line to a specific repair bill when it is ignored.
Fuel System
- Fill the tank to 90% — a full tank prevents condensation from forming on the tank walls during temperature swings. Condensation introduces water into your fuel, which causes ethanol phase separation (the ethanol drops out of the gasoline and settles to the bottom as a corrosive gel).
- Add fuel stabilizer — add the correct amount for your tank size and run the engine for 10 minutes to circulate treated fuel through the entire system including the carburetor or injectors.
Engine
- Fog the cylinders — spray fogging oil into the carburetor throat or spark plug holes per your engine manufacturer's instructions. This coats internal surfaces and prevents corrosion during storage.
- Drain the cooling system — on raw-water-cooled engines (most outboards), run the engine on muffs and let it self-drain. On closed-cooling systems, drain and replace with marine-rated antifreeze.
- Change lower unit oil — drain and refill with the correct weight gear oil. This is the single most important winterization step for outboard longevity. Water that seeped past the seals during the season will freeze, expand, and crack the lower unit housing over winter.
- Disconnect the battery — at minimum, disconnect the negative terminal. Better: remove the battery entirely and store it indoors.
Battery
- Remove from the boat — store in a dry location that stays above freezing.
- Connect to a trickle charger or battery maintainer — a battery that sits discharged all winter will sulfate and lose capacity permanently. A $30 maintainer saves a $150+ battery replacement every 2 years.
Drain All Water
- Open ALL drain plugs — every log, every drain point. Water trapped inside pontoon logs over a freeze-thaw cycle expands and cracks welds. This is the repair that costs $3,000–$10,000+.
- Tip the boat slightly — raise the bow on the trailer to drain water from low spots in the logs. Even a small amount of trapped water can cause damage in climates where temperatures drop below freezing.
- Drain the livewell, bilge, and any under-seat storage compartments — standing water breeds mold and mildew that destroys upholstery and carpet over winter.
Seats and Upholstery
- Clean thoroughly — do a full cleaning with marine vinyl cleaner before covering the boat. Dirt and stains that sit on vinyl all winter become permanent.
- Apply 303 Protectant — one final application before storage.
- Tilt seat backs up — leave seat backs tilted forward or up so air can circulate underneath. Seats stored flat against the deck trap moisture and grow mildew.
Cover and Storage
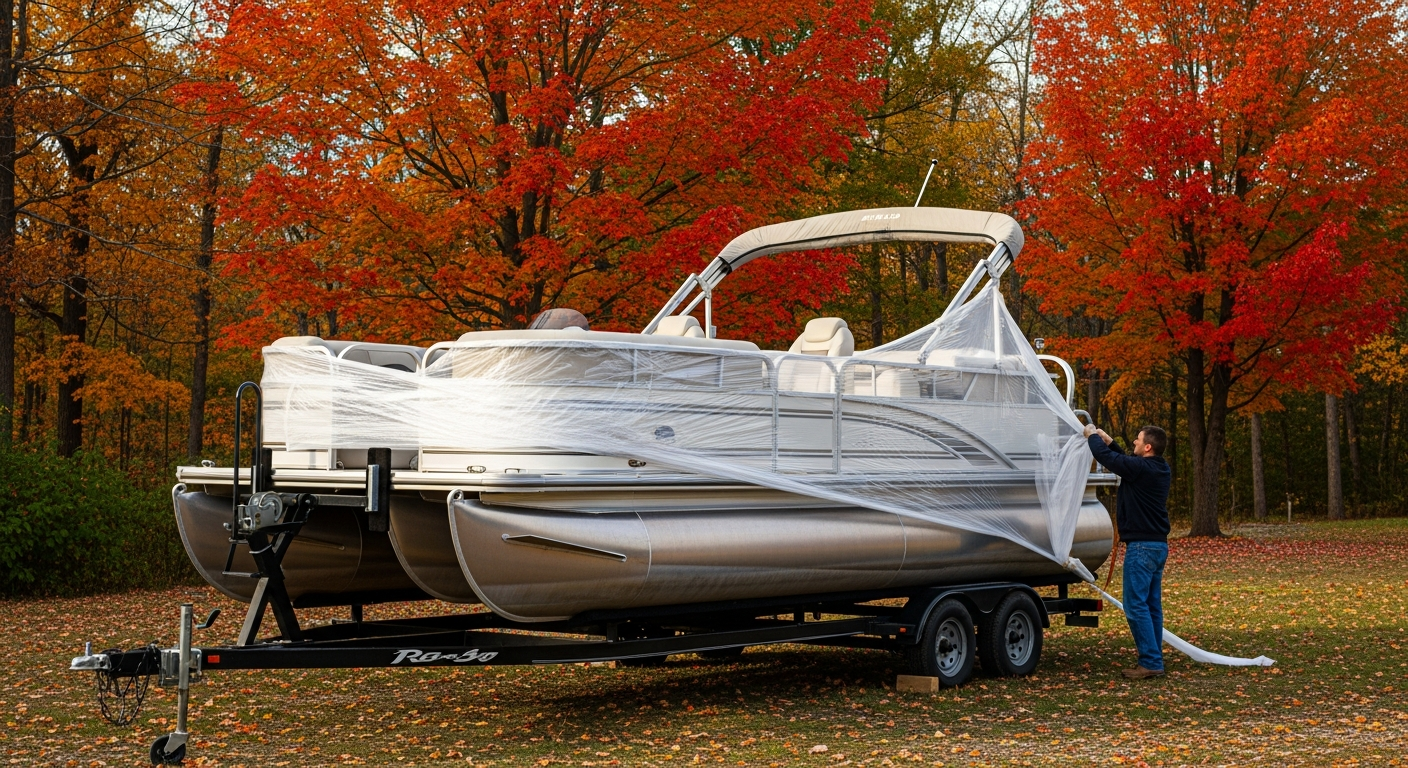
- Install a proper cover — solution-dyed polyester (Sunbrella or equivalent) is the standard. Cheap poly tarps trap moisture, sag, and tear within one season. The cover should fit snugly with no pooling areas.
- Use support poles — a pole framework under the cover prevents water pooling in the center. Pooled water weighs down the cover, stretches it, and eventually tears through — then your boat is uncovered for the rest of winter.
Trailer
- Block tires off the ground — if storing outside, place the trailer on jack stands or blocks so the tires are off the pavement. Tires that sit loaded in one position all winter develop flat spots.
- Apply grease to the coupler and jack — prevents corrosion and ensures the coupler latch and tongue jack operate freely in spring.
⚠️ The Tasks Most Owners Skip (That Cost the Most)
Every one of these items takes less than 15 minutes. Every one of them, when skipped, leads directly to a specific expensive repair.
Skipping this causes water in logs — the #1 most expensive pontoon repair at $3,000–$10,000+. A $2 gasket replaced every spring prevents it entirely. In what-I-wish-I-knew threads, drain plugs come up more than any other single item.
Water intrusion past worn seals goes undetected until the oil is drained. Water left in the lower unit over winter freezes and cracks the housing — $800–$1,500 repair.
A failed impeller stops water flow to the engine within seconds. Engine overheating follows within minutes. If you crack a cylinder head from overheating, the repair starts at $2,000+ — and some engines are not worth repairing at that point.
Ethanol phase separation gums carburetors and injectors. Cleaning a gummed carburetor costs $300–$600. Injector service is similar. An $8 bottle of stabilizer added before winter storage prevents it completely.
Seized wheel bearings on the highway cause trailer tire blowouts. As multiple owners note in boat-buying advice threads, a well-maintained trailer is one of the first things savvy buyers check — neglected bearings tank resale value. A blowout at highway speed can damage the fender, axle, wiring, and brake assembly — $500–$1,200+ in repair and towing, plus the danger of a blowout in traffic.
📋 Quick Reference Card
A condensed version you can screenshot or print and keep in your boat toolbox.
🌸 Spring — Before First Launch
- Replace drain plug gaskets
- Inspect logs for dents and corrosion
- Check all wiring connections
- Charge and load test battery
- Check fuel lines, replace fuel filter
- Check engine oil and lower unit oil
- Replace impeller if due
- Inspect prop for damage
- Clean seats, apply 303 Protectant
- Verify safety gear and dates
- Grease trailer bearings, check tires
🍂 Winter — Before Storage
- Fill fuel tank to 90%, add stabilizer
- Fog cylinders, drain cooling system
- Change lower unit oil
- Remove battery, connect maintainer
- Open ALL drain plugs, tip bow up
- Drain livewell, bilge, storage areas
- Clean seats, apply protectant, tilt up
- Install proper cover with support poles
- Block trailer tires off ground
- Grease coupler and tongue jack